Cleaning Dryer Vent From Inside: 5 Easy Methods To Try
Your dryer works hard, but the vent behind it may be quietly working against you. Cleaning dryer vent from inside your home is one of the most practical and impactful maintenance tasks a homeowner can take on, yet most people never attempt it until something goes wrong. Lint buildup inside the vent duct restricts airflow, raises fire risk, and drives up energy costs with every load. Knowing how professionals approach dryer vent maintenance can help you understand what thorough cleaning actually looks like.
In this guide, you will learn:
- Why cleaning your dryer vent from inside matters for safety and efficiency
- 5 practical methods for tackling the job yourself
- The tools that make interior dryer vent cleaning more effective
- Signs that your vent has reached a level of buildup that DIY cannot fully address
- How to keep your dryer vent cleaner for longer between deep cleanings
- When to stop the DIY approach and call in a professional
Why a Clogged Dryer Vent Is a Bigger Risk Than Most Homeowners Think

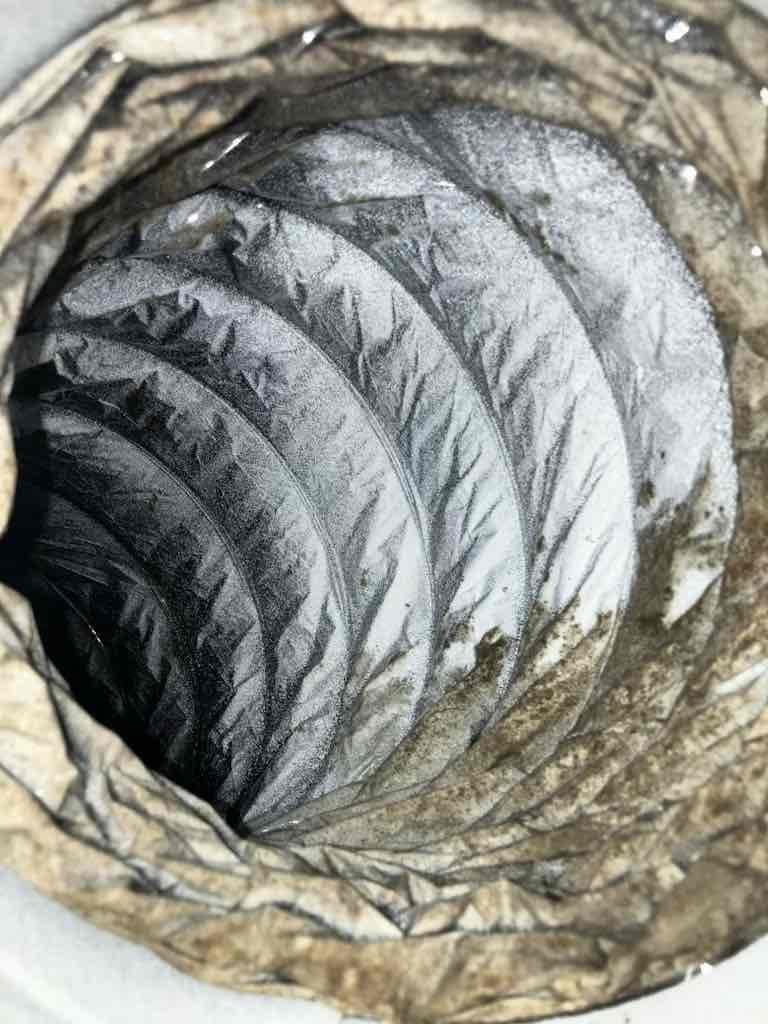
Most homeowners are aware that dryer lint is flammable, but far fewer understand just how quickly lint accumulates inside the vent duct itself and what the real-world consequences of that buildup look like. The lint trap catches a significant portion of what your clothes shed during a drying cycle, but a meaningful amount escapes the trap with every load and begins coating the interior walls of the vent duct. Over months and years, that coating thickens into a dense, highly combustible layer that your dryer’s heat element is more than capable of igniting.
Beyond the fire risk, a clogged interior dryer vent creates a chain of problems that affects your appliance, your utility bills, and your home environment in ways that compound over time:
- Increased Fire Danger With Every Load: The U.S. Fire Administration identifies failure to clean dryer vents as the leading cause of residential dryer fires. The interior duct section, which most homeowners never clean, is where the most significant and dangerous lint accumulation occurs over time.
- Longer Drying Cycles and Higher Energy Bills: When the vent duct is partially blocked, hot moist air from the drum cannot exhaust freely. The dryer compensates by running longer and hotter, consuming significantly more electricity or gas per load and shortening the lifespan of the heating element.
- Excess Heat Buildup Inside the Appliance: Restricted airflow traps heat inside the dryer drum and the mechanical components surrounding it. This excess heat stresses the motor, drum bearings, and thermal fuse, accelerating wear and leading to breakdowns that a clean vent could have prevented entirely.
- Moisture and Humidity Problems in the Laundry Room: When airflow through the vent is restricted, some of the humid exhaust air that should be escaping to the outside instead backs up and releases into the laundry area. In Ridgeland and surrounding areas, where ambient humidity is already elevated for much of the year, this additional moisture can contribute to mold growth on nearby surfaces.
- Carbon Monoxide Risk in Gas Dryers: For homes with gas-powered dryers, a blocked vent duct can prevent combustion gases from exhausting safely outdoors. This creates a potential carbon monoxide hazard that makes regular interior vent cleaning not just a maintenance task but a genuine household safety requirement.
5 Easy Methods for Cleaning Your Dryer Vent From Inside
Interior dryer vent cleaning does not require a professional on every occasion, particularly for shorter, straight vent runs that are accessible from the laundry room. The five methods below range from basic to more thorough, and choosing the right one depends on the length of your vent run, the amount of buildup present, and the tools you have available. Working through them in order from simplest to most involved is the most efficient approach.
1. Vacuum with a Long Hose Attachment
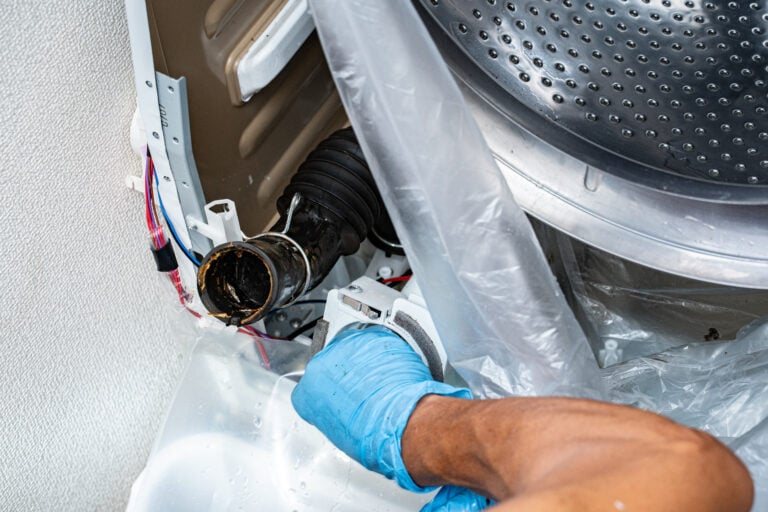
The most accessible starting point for cleaning dryer vent from inside is using a household vacuum equipped with the longest, narrowest hose attachment you have available. Pull the dryer away from the wall, disconnect the flexible duct from the back of the appliance, and insert the vacuum hose as far into the duct opening as it will reach. Work it back and forth slowly to dislodge and suction out lint from the accessible section of the duct.
- Use a crevice tool or a flexible extension attachment to maximize reach inside the duct opening
- Vacuum the connection point on the back of the dryer as well, where lint accumulates around the exhaust port
- Also vacuum the interior of the flexible transition duct itself, which connects the dryer to the wall duct and is a primary lint collection point
This method works well for light maintenance cleaning and for clearing the first 12 to 18 inches of the duct, but it is limited by the length of the attachment and will not reach lint that has settled further into a long vent run.
2. Dryer Vent Cleaning Brush Kit
A dryer vent brush kit is one of the most effective tools available for interior vent cleaning and is sold at most home improvement stores for a modest cost. These kits include a long, flexible brush with a rotating head that is designed to scrub lint from the interior walls of the duct as it is pushed through. Extension rods allow you to connect multiple sections together and reach vent runs of 10 feet or more from the inside.
- Disconnect the dryer from the wall duct before beginning to avoid pushing lint into the appliance
- Insert the brush head into the duct opening and rotate it clockwise as you push it forward to maximize contact with the duct walls
- Work in sections, pulling the brush back frequently to remove the loosened lint before pushing further
- Follow up with the vacuum after brushing to capture all the debris that has been dislodged and pulled toward the opening
Brush kits are the most recommended DIY tool for interior dryer vent cleaning because they physically scrub the duct walls rather than just suctioning from one end, which removes far more lint per pass than vacuum-only methods.
3. Leaf Blower or Air Compressor Blow-Through

For homeowners with access to a leaf blower or a portable air compressor, blowing air through the vent from the inside out is a fast and effective method for clearing light to moderate lint accumulation. Disconnect the dryer from the duct, insert the nozzle of the leaf blower or air compressor into the interior duct opening, and create as tight a seal as possible around the nozzle before turning it on. The burst of pressurized air pushes lint through the duct and out the exterior vent cap.
- Place a tarp or old sheet below the exterior vent opening before you begin to catch the lint that blows out
- Have someone stationed at the exterior vent if possible to confirm that air and lint are exiting freely
- This method is most effective on shorter, straighter vent runs where there are few bends to trap debris
Be aware that this approach works best as a follow-up to brushing rather than as a standalone method. Blowing air through a vent with heavy, compacted lint buildup may not dislodge it completely and can sometimes push loose debris further into the duct rather than all the way through to the exterior.
4. Flexible Dryer Vent Cleaning Rods With a Power Drill
For longer vent runs with more significant buildup, attaching a flexible cleaning rod kit to a low-speed power drill gives the brush head enough rotational force to break through compacted lint that hand-rotating cannot effectively remove. The drill spins the rod and brush at a controlled speed while you guide it through the duct from the inside, providing a more thorough scrub of the interior walls with less physical effort.
- Always use the drill on its lowest speed setting to avoid tangling the flexible rod inside the duct
- Keep consistent forward pressure and never reverse the drill direction while the rod is inside the duct, as this can cause the rod sections to unscrew and become lodged
- Work in short forward and backward strokes rather than pushing straight through in one continuous motion
- Vacuum out the loosened debris thoroughly after each pass before continuing deeper into the duct
This method is particularly useful in Ridgeland and surrounding areas, where homes with longer exterior wall setbacks sometimes have dryer vent runs of 15 feet or more that hand tools simply cannot reach effectively.
5. Combined Inside and Outside Approach
The most thorough interior dryer vent cleaning method combines access from both the inside and the outside simultaneously. While one person works the brush kit or vacuum attachment from the laundry room end of the duct, a second person removes the exterior vent cap and uses a separate brush or vacuum to work from the outdoor end. This two-direction approach ensures that lint loosened from one end is captured rather than repacked into a section further along the duct.
- Coordinate movement so both tools are not pushing toward each other at the same time inside the duct
- The person at the exterior end should reinstall the vent cap only after confirming that the flap opens and closes freely without restriction
- Check that the exterior vent cap screen, if present, is clear of lint, debris, and any nesting material from birds or insects before closing it back up
This method takes more coordination and ideally a second person, but it produces the most complete results of any DIY interior cleaning approach and is well worth the extra effort for vents that have not been cleaned in more than a year.
Tools That Make Interior Dryer Vent Cleaning More Effective
Having the right equipment before you start makes the difference between a surface-level cleaning and one that actually removes the lint coating the interior duct walls throughout the full length of the run. Most of these tools are available at hardware or home improvement stores and represent a worthwhile investment for any homeowner who wants to keep up with this maintenance task annually.
- Flexible Vent Brush Kit: The core tool for any thorough interior cleaning. Look for a kit with a brush head diameter that matches or slightly exceeds your duct diameter, typically four inches for standard residential dryers, and enough extension rods to cover your full vent length.
- HEPA Shop Vacuum: A standard household vacuum lacks the suction power and filtration needed to capture fine lint particles effectively. A shop vacuum with a HEPA filter provides the suction to pull debris out from deeper in the duct and traps fine particles rather than exhausting them back into the room.
- Duct Length Measuring Tape or Inspection Camera: Knowing the exact length of your vent run before you start tells you how many extension rod sections you need and whether the run is within the range that DIY methods can fully address. A small flexible inspection camera, available inexpensively online, allows you to see inside the duct before and after cleaning to assess both the extent of buildup and the quality of your results.
- Work Light and Safety Glasses: Lint dislodged during cleaning will fall and drift toward the person doing the work. Safety glasses protect your eyes during brushing, and a work light positioned at the duct opening helps you see what is coming out as you work.
- Foil Tape for Duct Reconnection: After disconnecting and reconnecting the flexible transition duct during cleaning, use metal foil tape rather than standard duct tape to reseal any joints. Standard duct tape degrades with heat exposure and loses adhesion over time, while foil tape maintains a durable, airtight seal.
How to Keep Your Dryer Vent Cleaner Between Deep Cleanings

Performing a thorough interior cleaning once a year is the recommended baseline, but the habits you maintain between deep cleaning sessions have a significant impact on how quickly buildup returns and how much lint your vent accumulates over the course of a year.
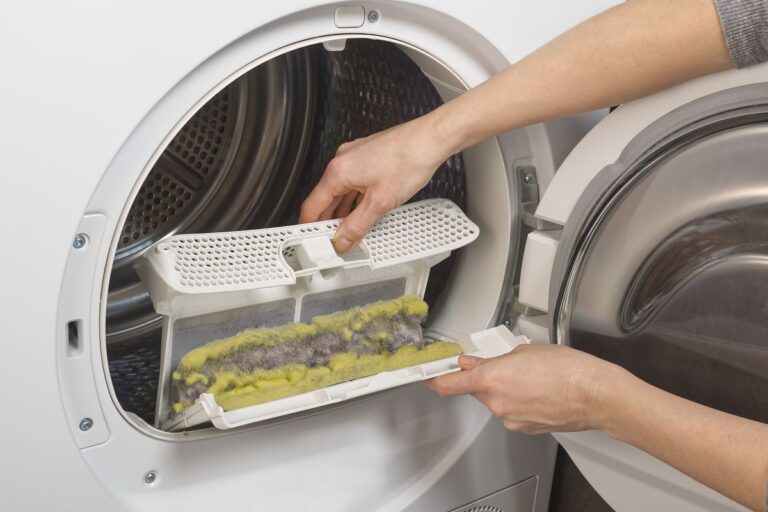
Clean the Lint Trap Before Every Single Load
This is the most impactful daily habit for reducing the amount of lint that reaches the vent duct in the first place. A full lint trap restricts airflow through the drum and forces more fine lint to bypass the screen and enter the duct. Clearing the trap before every load keeps the primary filter functioning at full capacity and directly reduces duct accumulation over time.
Wash the Lint Screen Monthly
Running your finger across the lint screen after removing visible lint is not enough. Dryer sheet residue and fabric softener buildup create a film on the mesh that reduces airflow even when the screen looks clean. Once a month, wash the screen under warm running water with a soft brush and a small amount of dish soap. If water pools on the surface rather than passing through immediately, the screen has product buildup that needs to be removed.
Inspect the Exterior Vent Cap Seasonally
Walk around to your home’s exterior dryer vent cap at least once per season and confirm that the flap opens freely when the dryer is running and closes fully when it is not. A flap stuck open allows outdoor air, moisture, and pests to enter the duct. A flap stuck closed restricts exhaust airflow and accelerates interior lint buildup. In Ridgeland and surrounding areas, insect nests and spider webs inside the vent cap are common seasonal issues that can block the flap without being immediately obvious.
Avoid Overloading the Dryer
Drying oversized loads forces the dryer to work longer and harder, generating more lint per cycle and pushing more of it past the lint trap and into the vent duct. Keeping loads to the manufacturer’s recommended capacity reduces wear on the appliance and meaningfully slows the rate of lint accumulation inside the vent.
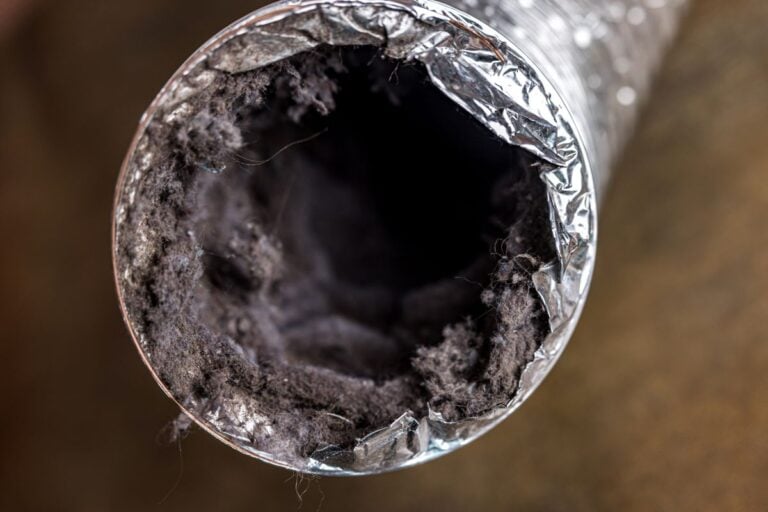
Use the Right Duct Material
If your dryer currently connects to the wall through a plastic or foil accordion-style transition duct, consider upgrading to rigid or semi-rigid metal duct. Plastic and foil accordion ducts have ribbed interiors that trap lint at every fold, making them far more prone to rapid buildup than smooth-walled metal duct sections. The smoother interior of rigid metal duct allows lint to travel through with significantly less resistance and accumulation.
When DIY Dryer Vent Cleaning Is Not Enough
Taking good care of your dryer vent is a task every committed homeowner can manage, and the five methods covered in this guide will handle the majority of routine cleaning situations effectively. However, there are specific circumstances where DIY methods reach their limit and professional cleaning becomes not just helpful but necessary for the safety of your home and the people in it.
If your vent run is longer than 25 feet, includes multiple 90-degree bends, or runs vertically through the wall rather than horizontally, flexible brush kits and leaf blowers may not be able to reach or dislodge buildup in the sections where lint accumulates most heavily. Similarly, if you notice a burning smell when the dryer runs, find that clothes are still damp after a full cycle, or discover that the exterior vent flap barely moves during operation, the level of buildup present is likely beyond what interior DIY cleaning can fully resolve. These are the situations where professional equipment makes a decisive difference.
Pro Shine Professional Cleaning serves homeowners throughout Ridgeland and surrounding areas with professional dryer vent cleaning that uses truck-mounted equipment and specialized tools to clear the entire vent system from end to end, regardless of length, routing, or buildup level. Our technicians inspect before and after, show you exactly what was removed, and ensure your vent is flowing freely and safely by the time we leave. Do not wait for your dryer to tell you something is wrong. Contact us today and let us take care of the parts of your vent system that even the best DIY methods cannot reach.
Clean Air Is Just A Call Away!