How To Clean Dryer Vent On Roof? (Use 5 Simple Tools)
When a dryer vent exits through the roof instead of through an exterior wall, it creates a cleaning challenge that most homeowners are not prepared for. Knowing how to clean dryer vent on roof safely and effectively requires the right tools, a clear process, and an honest assessment of whether the job is one you should be doing yourself. The same careful thinking that goes into keeping any exhaust and ventilation system running safely and efficiently applies here. Done right, it protects your home. Done poorly, it can make things worse.
In this guide, you will learn:
- Why roof-mounted dryer vents create specific risks that wall-exit vents do not
- The 5 simple tools you actually need to clean a roof dryer vent effectively
- A clear, safe process for completing the job from start to finish
- The warning signs that tell you cleaning is overdue or that a professional is needed
- How the humid South Carolina climate affects roof dryer vent maintenance and timing
- When the DIY approach has reached its limits and what to do instead
Why Roof-Mounted Dryer Vents Demand More Attention Than Wall-Exit Vents

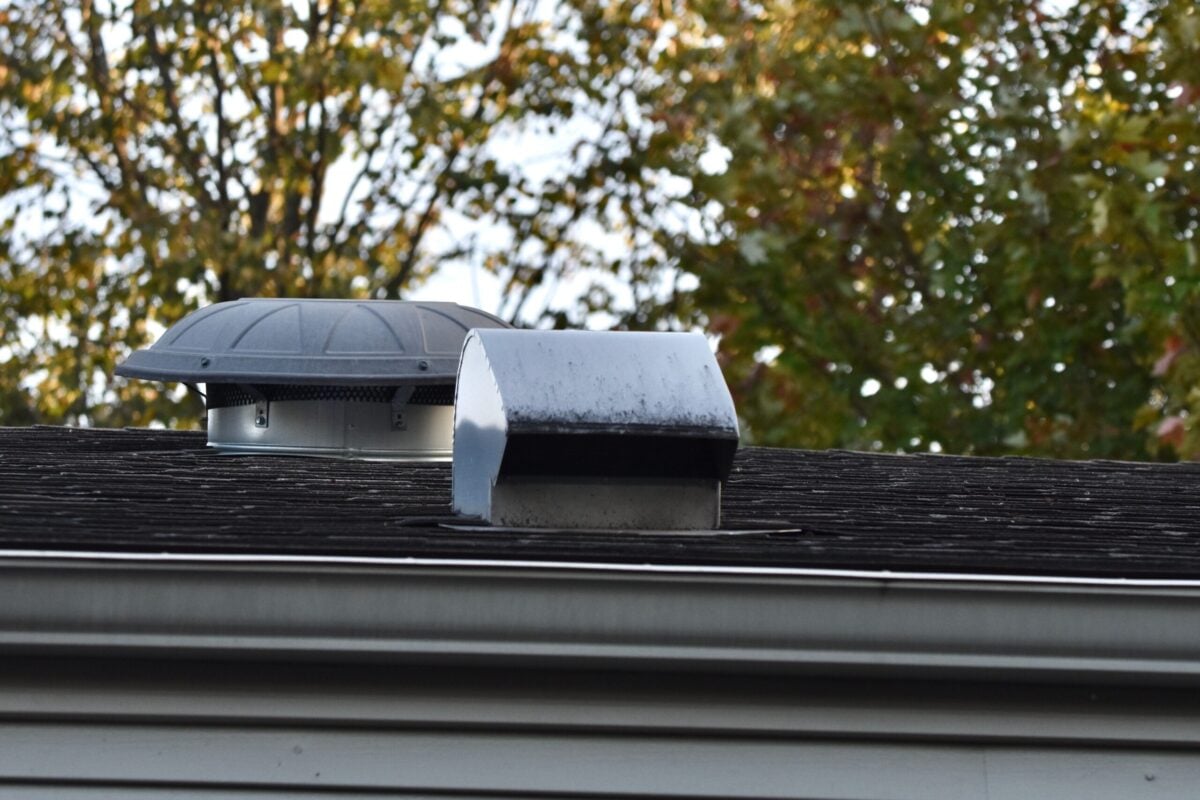
Not all dryer vents are created equal, and the ones that exit through the roof present a set of challenges that are simply not present with a standard wall-exit configuration. The routing is longer. The vent cap is exposed to ice, snow, bird nesting, and debris in ways that a wall-mounted cap is not. And the access required to service it puts you on a pitched roof surface, which introduces a physical risk that has nothing to do with the dryer and everything to do with gravity.
In Saint Helena and surrounding areas, roof-mounted dryer vents face the additional strain of South Carolina’s heat and humidity, where warm, moist air inside the duct accelerates lint buildup, pest nesting activity peaks during long warm seasons, and the intense sun exposure on dark roof surfaces degrades cap materials faster than in milder climates. Understanding why roof dryer vents require more deliberate maintenance is the first step toward staying ahead of the problems they can cause.
- Higher Fire Risk from Longer Duct Runs: Roof-exit vent configurations almost always involve longer duct runs than wall-exit setups, which means more interior surface area for lint to accumulate before it exits the home. Longer runs with more bends slow the velocity of exhaust airflow, which causes lint to settle out of suspension and coat duct walls faster than in shorter, straighter configurations.
- Cap Exposure to the Elements: A roof-mounted dryer vent cap is exposed to UV degradation, freeze-thaw cracking, wind loading, and debris accumulation year-round. The flap mechanism that opens during dryer operation and closes to prevent backdrafting is particularly vulnerable to failure in cold-climate conditions, where it can freeze shut or warp enough to no longer close fully.
- Bird and Pest Nesting Risk: Roof vent caps are attractive nesting sites for birds, particularly in early spring. A nest inside or directly behind the vent cap creates an immediate and severe restriction of exhaust airflow that combines with existing lint accumulation to create one of the most dangerous vent configurations a dryer can operate through.
- Reduced Visibility and Inspection Difficulty: You cannot see or easily inspect a roof vent cap from ground level the way you can observe a wall-mounted cap during dryer operation. Problems that would be immediately noticeable on a wall cap, including a stuck flap or obvious debris accumulation, can persist for months in a roof configuration without the homeowner realizing anything is wrong.
- Access Risk That Compound the Maintenance Challenge: Every aspect of servicing a roof-mounted dryer vent, from inspection to cleaning to cap replacement, requires safe roof access. This physical requirement turns a straightforward maintenance task into one that demands proper safety equipment and a realistic self-assessment of whether roof work is something you are equipped to do safely.
5 Simple Tools You Need to Clean a Dryer Vent on the Roof
Using the right tools makes the difference between a roof dryer vent cleaning that actually clears the full duct run and one that disturbs surface lint without addressing the buildup deeper in the system. These five tools are the practical minimum for a job done correctly, and understanding what each one does helps you know whether you are equipped to proceed before you ever step onto the roof.
Tool 1: Flexible Dryer Vent Brush Kit with Extension Rods
The flexible brush kit is the core cleaning tool for any dryer vent, and for a roof-exit configuration it needs to have sufficient rod length to reach through the full duct run from the roof cap opening to the dryer connection. Standard residential flex duct runs to a roof exit can range from 15 to 35 feet depending on the building height and routing, so having enough extension rods to cover your specific run length before you start is not optional.
- Look for a kit with a brush head diameter that matches your duct size, typically 4 inches for standard residential dryer duct
- Fiberglass extension rods navigate bends more effectively than rigid plastic rods and are worth the additional cost for longer or more complex duct runs
- Confirm all rod connections are fully tightened before inserting the brush, as a rod that unscrews inside the duct during roof-level cleaning is extremely difficult to retrieve without additional tools or professional intervention
Tool 2: HEPA Shop Vacuum with Long Hose Attachment
A standard household vacuum is not adequate for dryer vent cleaning. The suction capacity is insufficient to pull fine lint particles from a duct run of any meaningful length, and the lack of HEPA filtration means that fine particles exhausted back into the room during cleaning become airborne respiratory irritants. A shop vacuum rated for fine dust with a HEPA filter and the longest hose attachment available gives you the suction needed to collect dislodged lint at the dryer end of the duct while brushing from the roof.
- Seal the dryer end of the duct to the shop vacuum hose using tape or a snug-fitting adapter so that the vacuum creates meaningful suction throughout the duct run during brushing
- Empty the vacuum canister before beginning so it has full capacity for the lint volume you will be removing
- Run the vacuum at the dryer end continuously while a second person brushes from the roof, which maximizes the amount of dislodged lint that travels toward the vacuum rather than settling back into the duct
Tool 3: Cordless Drill for Powered Rod Rotation
Attaching the flexible brush kit extension rods to a low-speed cordless drill provides significantly more agitation force than hand-rotating the rods, which produces more effective debris dislodgement from duct surfaces particularly in the deeper sections of a long roof-exit run. The drill should be used at its lowest speed setting to avoid tangling the flexible rods or building rotational stress that causes the rod connections to fail.
- Set the drill to its lowest speed setting before attaching the rods. Higher speeds with flexible rods risk tangling the assembly inside the duct
- Rotate in one direction only during insertion. Never reverse the drill direction while the rods are inside the duct, as this unscrews the rod connections
- Work in short forward and backward strokes rather than pushing the full rod length in one continuous motion, which allows dislodged lint to move toward the vacuum end between passes
Tool 4: Roof Safety Equipment

This is not optional, and it is the tool that most homeowners underestimate or skip entirely. Working on a pitched roof to access a dryer vent cap requires, at minimum, rubber-soled footwear with genuine grip, a personal fall arrest harness rated for your weight, a roof anchor that can be securely attached to a structural element below the roof surface, and a lanyard or self-retracting lifeline connecting the harness to the anchor.
- Roof work should only be attempted on dry surfaces. Wet roofing material after rain, which is a frequent condition in coastal South Carolina, is not an appropriate surface for any DIY roof access
- Never work on a roof alone. A second person on the ground is essential both for safety monitoring and for assisting with tool management and emergency response if something goes wrong
- If the roof pitch exceeds 6:12 (a rise of 6 inches for every 12 inches of horizontal run), the difficulty and risk of maintaining footing while working increases significantly and professional service becomes the more appropriate choice for most homeowners
Tool 5: Flashlight and Flexible Inspection Mirror
Before and after brushing, a flashlight and a flexible inspection mirror allow you to look into the accessible section of the roof vent opening and assess the level of buildup present, the condition of the interior duct surface, and whether the cleaning pass has been effective. This inspection step is what separates a cleaning that you can confirm produced results from one that simply went through the motions.
- A smartphone with a camera and a bright flashlight setting can supplement or replace a dedicated inspection mirror if the duct opening geometry allows
- For longer duct runs where the interior is not visible from the opening, noting whether the shop vacuum is collecting active lint throughout the brushing process and whether airflow from the vent cap improves after cleaning are the practical proxies for interior inspection
- Any visible damage to the duct interior, including separated joints, collapsed sections, or areas where the duct liner appears torn or deteriorated, should be documented and addressed before resuming dryer operation
The Safe Process for Cleaning a Roof Dryer Vent From Start to Finish
Having the right tools matters, but the sequence in which you use them is what determines whether the cleaning is both safe and effective. Working through these phases in order prevents the most common mistakes that either leave lint in the duct or create new problems during the cleaning process.
Phase 1: Preparation Before You Go Anywhere Near the Roof
Prepare everything before accessing the roof so that you are not making trips up and down repeatedly. Unplug the dryer and turn off the gas supply if it is a gas unit. Gather all tools and confirm the brush kit has enough rods to cover your estimated duct length. Set up the shop vacuum at the dryer location with the hose connected to the duct opening and the vacuum running. Confirm weather conditions are appropriate for roof access and that your safety equipment is properly fitted and anchor point is identified.
Phase 2: Remove and Inspect the Roof Vent Cap
Once safely on the roof with your fall arrest system in place, remove the vent cap by unscrewing the fasteners securing it to the roof surface. Most roof dryer vent caps use sheet metal screws through a flange that sits under the surrounding roofing material. Inspect the cap for damage, warping, frozen or stuck flap mechanisms, and any nesting material. Remove and dispose of any nesting material before proceeding. Inspect the visible section of duct below the cap opening with your flashlight and mirror.
Phase 3: Brush the Duct From the Roof Opening
With the shop vacuum running at the dryer end, insert the brush head into the roof vent opening and begin working the brush into the duct with the cordless drill at low speed. Advance the brush in short strokes, adding extension rods as needed to reach the full length of the run. Work the brush back and forth in each section before advancing further rather than pushing straight through to the end in one pass. Periodically withdraw the brush toward the roof opening and allow the vacuum to pull any dislodged lint toward the dryer end before re-inserting for the next section.
Phase 4: Vacuum Both Ends and Inspect
After completing the full brushing pass, use the shop vacuum at the dryer end to clear any remaining loose lint from the accessible section of duct near the appliance. Then remove the shop vacuum hose, restore the dryer connection, and return to the roof with the flashlight and mirror to inspect the vent opening interior. Verify that the brushing pass visibly improved the interior surface condition and that no tools or rod sections have been left inside the duct.
Phase 5: Reinstall the Cap and Test the System
Reinstall the roof vent cap with its fasteners, ensuring the flap mechanism moves freely and the cap is properly sealed against the roof surface. Descend safely, reconnect and power the dryer, and run a timed heat cycle for five to ten minutes. Return to the roof or observe from a location where you can assess airflow from the cap during operation. Strong, consistent airflow during the cycle confirms the cleaning was effective.
Warning Signs That Your Roof Dryer Vent Needs Attention Right Now

There are conditions that make waiting until your next scheduled cleaning a genuine risk rather than a minor inefficiency. Recognizing these warning signs allows you to respond before the situation becomes dangerous.
Performance Indicators Inside the Home
If clothes are still damp or unusually hot to the touch after a full drying cycle, the vent is likely restricted enough to prevent adequate exhaust airflow. This symptom does not distinguish between a lint blockage and a damaged or obstructed cap, but both conditions require immediate attention before additional loads are run through the dryer. In Saint Helena and surrounding areas during the hottest months, a dryer running through a restricted roof vent generates significantly elevated internal temperatures that accelerate wear on the heating element and raise fire risk with every cycle.
A burning smell during dryer operation is a more urgent warning that requires stopping the dryer immediately. This odor indicates that lint somewhere in the vent system has reached a temperature where scorching begins, which is the step immediately before ignition. Do not run the dryer again until the vent has been fully inspected and cleared.
Indicators Visible From Ground Level or the Roof
Visible debris accumulation at the cap opening, including lint matted against the flap or exterior cap surface, is a reliable indicator that the interior is in a similar or worse state. A vent cap flap that does not open during dryer operation, observable on most cap styles by watching the flap position from a safe vantage point during a drying cycle, indicates a blockage or cap failure that is actively restricting exhaust airflow during every load.
For homeowners in Saint Helena and surrounding areas, pest nesting inside the roof vent cap is worth a seasonal visual check from ground level using binoculars, particularly in spring and early summer when bird activity peaks. A nest that has sealed or partially blocked the cap opening creates a significant restriction that forces exhaust airflow back into the home and, for gas dryers, creates a carbon monoxide risk that makes running the appliance genuinely dangerous until the blockage is cleared.
When the Roof Is Not the Right Place to Be Handling This Yourself
There are specific situations where the honest answer to whether you should be cleaning your own roof dryer vent is no. Recognizing these situations before you attempt the job is significantly better than recognizing them partway through.
| Situation | DIY Appropriate? | Better Option |
| Roof pitch under 6:12, dry conditions, proper safety gear | Yes, with care | Proceed with process above |
| Roof pitch over 6:12 | No | Schedule professional service |
| Wet, icy, or frost-covered roof surface | No | Wait for dry conditions or call professional |
| Duct run over 30 feet with multiple bends | Limited | Professional with truck-mounted equipment |
| Burning smell during dryer operation | No | Stop dryer, call professional immediately |
| Bird nest inside duct or cap housing | With caution | Professional removal recommended |
| Cap visibly damaged, warped, or missing flap | Partial | Clean duct, replace cap or call for assessment |
| No fall arrest equipment available | No | Do not access roof, call professional |
Your Dryer Vent Deserves a Clean You Can Stand Behind
A roof-mounted dryer vent is one of the most overlooked maintenance items in any home, precisely because it requires extra effort to reach and inspect. The lint accumulating inside it does not stop building between cleaning cycles, and in a humid coastal climate the combination of lint restriction, pest nesting, and UV-degraded cap materials creates conditions that put both your appliance and your home at risk. The five tools covered in this guide and the process that follows them give you a real chance at completing the job correctly. But knowing when the job belongs to someone else is just as important as knowing how to do it.
Pro Shine Professional Cleaning works with homeowners throughout Saint Helena and surrounding areas on dryer vent problems that are genuinely too complex or too risky to handle without professional support. If your roof dryer vent situation involves a duct run that is beyond what consumer tools can address, a safety situation that makes roof access inappropriate, or a level of buildup that suggests something more than a routine cleaning is needed, contact us today and let our team assess what your system actually needs and take the risk off your plate.

Clean Air Is Just A Call Away!