
How To Clean Dryer Vent Without Moving Dryer? (6 Easy Steps)
Cleaning a dryer vent is one of the most important maintenance tasks in any home, but for most homeowners the appliance sits wedged between a wall and a cabinet with nowhere obvious to go. Knowing how to clean dryer vent without moving dryer means you can still address lint buildup effectively, even when the space around the appliance makes pulling it out impractical or impossible. Understanding how lint and airflow maintenance works throughout the full vent system will help you clean smarter and know when to call for backup.
In this guide, you will learn:
- Why cleaning the dryer vent without moving the appliance is a viable and effective approach
- 6 clear steps to clean your dryer vent without pulling the dryer away from the wall
- The right tools that make this method work from both ends of the vent
- How to identify when the method has reached its limits and a deeper cleaning is needed
- What to look for at the exterior vent cap before and after cleaning
- When a professional dryer vent cleaning delivers results this approach cannot match
Before You Start: What You Need to Know About Cleaning Without Moving the Dryer

Not being able to move the dryer does not mean the vent cannot be cleaned. The two access points that matter most in any dryer vent cleaning, the interior duct opening at the back of the appliance and the exterior vent cap on the outside of the home, are both reachable without pulling the appliance away from the wall. In fact, the most effective approach for homeowners in this situation is to work from both ends simultaneously or in sequence, which produces results comparable to a full pull-out cleaning for most standard vent configurations.
In Savannah and surrounding areas, where many homes have laundry rooms located against exterior walls or in narrow alcoves, cleaning the dryer vent without moving the dryer is the practical reality for a significant number of households. Knowing the right technique, the correct tools, and the limitations of this approach puts you in a much better position than either skipping the cleaning entirely or damaging the appliance by forcing it into a space it does not fit.
- The Method Is Effective for Most Vent Lengths: For vent runs of up to 20 to 25 feet with no more than two 90-degree bends, cleaning from the exterior cap end and the interior duct opening without moving the dryer can reach most of the lint accumulation that builds up in a typical residential system.
- Both Access Points Are Essential: Cleaning from only one end, either just through the interior duct opening or just from the exterior cap, is significantly less effective than working both ends in sequence. Lint dislodged from one end needs to travel to the other, and maximizing airflow during the process requires both ends to be open and accessible.
- The Right Brush Kit Extends Your Reach: Consumer-grade flexible dryer vent brush kits with extension rods allow you to reach 10 to 20 feet or more inside the vent from the exterior cap without ever touching the dryer. This is the primary tool that makes the no-move approach work for most homeowners.
- You Cannot Skip the Lint Trap Housing: Even when the full duct cannot be addressed from the interior, the lint trap housing slot, the compartment directly below the lint screen inside the dryer, accumulates significant lint that feeds into the duct system over time. This section is always accessible without moving the dryer and should be part of every cleaning.
- Know Your Vent Run Before You Start: If your dryer vent run exceeds 25 feet, includes more than two bends, or runs vertically through the wall rather than horizontally, the no-move method may not reach all of the accumulated lint. In these configurations, professional cleaning or actually moving the dryer becomes necessary.
6 Easy Steps to Clean Your Dryer Vent Without Moving the Dryer
These six steps are designed to maximize the effectiveness of a dryer vent cleaning when the appliance cannot be pulled away from the wall. Work through them in order for the best result. You will need a flexible dryer vent brush kit with extension rods, a HEPA shop vacuum, a screwdriver, and a flashlight.
Step 1: Turn Off and Disconnect the Dryer Completely
Before any cleaning begins, turn the dryer off and unplug it from the wall outlet. For gas dryers, turn off the gas supply valve behind or below the unit before proceeding. This step is non-negotiable. Even with the dryer in its standard position against the wall, working around or near the appliance with tools requires the power and gas supply to be fully disconnected for the duration of the cleaning.
- Gas dryers typically have a shutoff valve on the gas supply line immediately behind or alongside the unit. Turn it to the closed position before beginning
- Leave the dryer unplugged for the entire cleaning process, even during steps that do not directly involve the appliance
- Confirm the dryer drum is completely empty before beginning to avoid lint being pushed back into the clothing area during the cleaning
Step 2: Clean the Lint Trap and Lint Trap Housing Slot
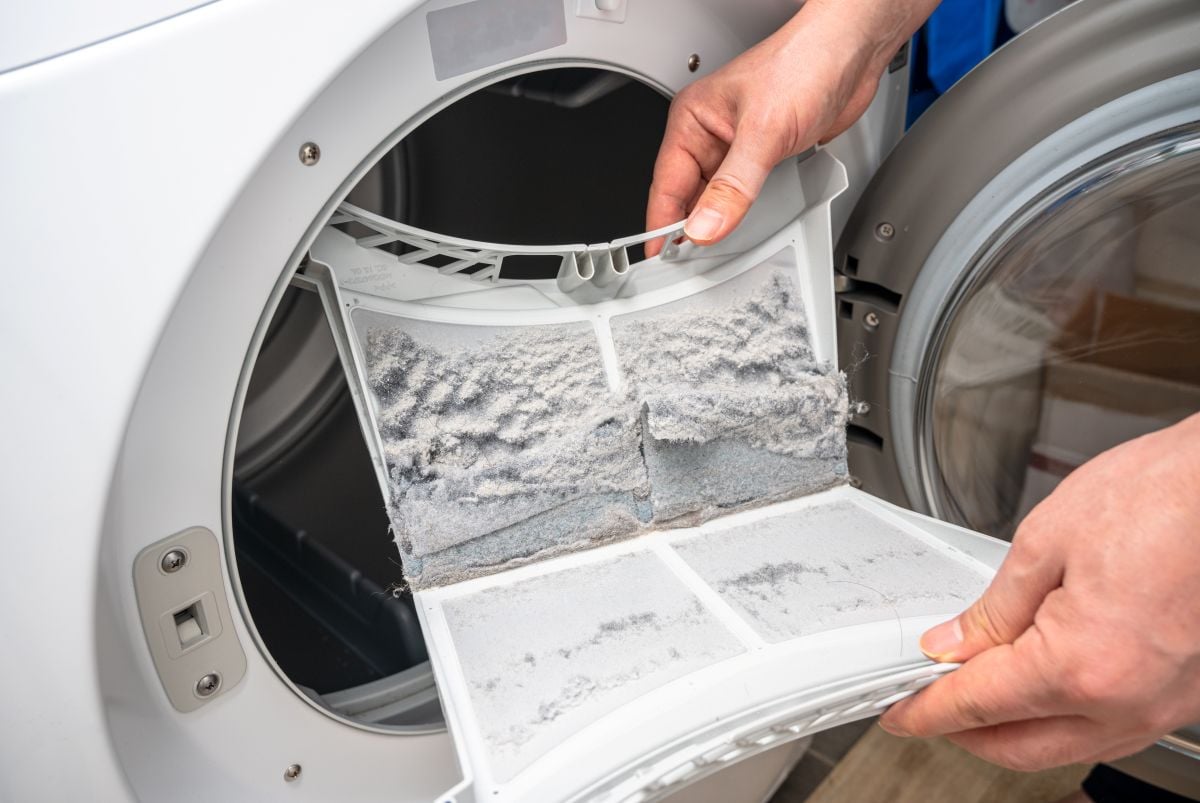
With the dryer disconnected, remove the lint screen from its slot and pull off any visible lint. Then use the narrow crevice attachment of your shop vacuum to reach down into the lint trap housing slot as far as the attachment will allow, vacuuming the walls of the slot and the base where fine lint collects between every cycle. This section of the vent pathway is always accessible without moving the dryer and is frequently overlooked in routine cleaning.
- Follow the vacuum pass with a flexible lint trap brush, which is a long-handled narrow brush sold specifically for lint trap housing cleaning and available at most hardware stores
- Wash the lint screen itself with warm water and a soft brush to remove fabric softener residue film, then allow it to dry completely before reinserting
- A clogged or residue-coated lint trap slot is one of the most common sources of reduced airflow in residential dryer systems and is worth thorough attention at every cleaning
Step 3: Locate and Remove the Exterior Vent Cap
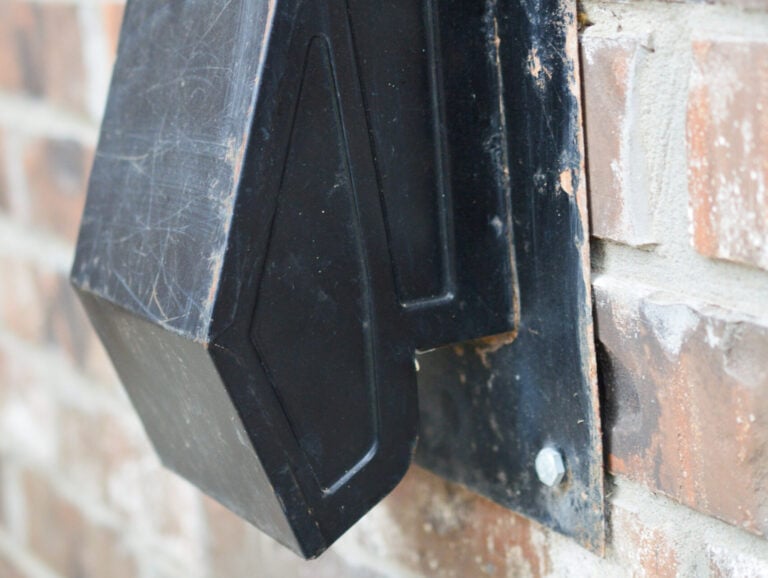
Walk around to the outside of your home and locate the exterior dryer vent cap. It is typically a louvered or flapped grille mounted on the exterior wall at the height of the laundry room, though in some homes it exits through the roof or crawl space. Remove the vent cap if it is held with screws, or simply hold it open if it lifts off. Examine the opening for any visible lint buildup, nesting material from birds or insects, or a flap that is stuck in the closed position.
- In Savannah and surrounding areas, bird nests and spider webs inside dryer vent caps are common during spring and summer months and can create a blockage that is entirely independent of lint accumulation inside the duct
- A stuck or broken exterior flap that does not open freely significantly restricts exhaust airflow even when the interior of the duct is clean, so check and address flap operation as part of this step
- Remove any visible nesting material or debris from the exterior opening before inserting any cleaning tools
Step 4: Insert the Flexible Brush Kit From the Exterior Opening

With the exterior vent cap removed and the opening clear, insert the head of your flexible dryer vent brush into the duct opening. Connect extension rods as needed and rotate the brush clockwise as you push it into the duct, scrubbing the interior walls as you advance. Work in short forward and backward strokes rather than one long continuous push, and pull the brush back toward the exterior opening frequently to remove the lint it has dislodged before pushing deeper.
- Make sure all extension rods are tightened securely before inserting the brush, as a rod that unscrews inside the duct is extremely difficult to retrieve without moving the appliance
- Work slowly and methodically. Rushing the brush through the duct pushes lint further into the system rather than dislodging it toward the opening where the vacuum can collect it
- After each forward pass, use the shop vacuum at the exterior opening to suction out the lint the brush has moved toward you before inserting the brush again for the next section
Step 5: Vacuum Both Ends Thoroughly
Once you have brushed the full length of the duct from the exterior end, use the shop vacuum at both access points to collect all dislodged lint. Place the vacuum hose at the exterior vent opening and run it for several minutes to draw out loosened material from the full length of the run. Then move inside and use the vacuum at the lint trap housing slot again to collect any fine particles that have settled there during the brushing process.
- Run the dryer on an air-only or timed setting for two to three minutes after vacuuming, with both the lint trap and the exterior cap open, to allow airflow to carry any remaining fine lint particles toward the exterior opening
- After running the dryer briefly, return to the exterior cap opening and check for any additional lint that has been carried toward the exit by the airflow
- In humid coastal climates, where fine lint particles can clump and stick to duct walls rather than moving freely with airflow, this blower assist step is particularly useful for dislodging material that the brush alone may not have fully cleared
Step 6: Reinstall the Exterior Vent Cap and Test the System
Reattach the exterior vent cap with its mounting screws and confirm the flap opens and closes freely. Return inside, plug the dryer back in, and restore the gas supply if applicable. Run the dryer on a timed heat cycle for five to ten minutes and then return to the exterior of the home to verify that the vent flap is opening fully and that you can feel a strong, consistent airflow from the opening. Weak airflow after a full cleaning pass indicates either remaining obstruction in the duct or a problem with the appliance itself.
- A clear, successfully cleaned vent should produce noticeably stronger airflow at the exterior cap than it did before cleaning, which is the simplest confirmation that the process was effective
- If airflow remains weak after completing all six steps, the remaining restriction is likely located at a bend or in a section of the duct that the brush kit could not reach from the exterior end
- Repeat the lint trap housing vacuum pass one final time before declaring the job complete to capture any fine material that settled during the cleaning and test cycle
The Right Tools for Cleaning a Dryer Vent Without Moving the Dryer
The no-move method depends entirely on having the right tools, because reach and flexibility are the substitutes for the access that pulling the dryer out would otherwise provide. Using inadequate equipment produces incomplete results and can give homeowners a false sense of confidence that the vent is clean when significant lint remains deeper in the duct.
- Flexible Dryer Vent Brush Kit with Extension Rods: The core tool for this method. Look for a kit with a brush head diameter matching your vent size, typically four inches for standard residential dryers, and enough rods to cover your estimated duct length. Fiberglass rods are more flexible than rigid plastic and navigate bends more effectively.
- HEPA Shop Vacuum: A standard household vacuum lacks the suction capacity to pull fine lint particles from a dryer duct effectively. A shop vacuum with a HEPA filter provides the suction needed and captures particles without exhausting them back into the room. The HEPA filter is particularly important because dryer lint includes fine fibers that are respiratory irritants when airborne.
- Dryer Lint Trap Brush: A separate long-handled narrow brush designed specifically for the lint trap housing slot. These are inexpensive and reach sections of the housing that the shop vacuum crevice tool alone cannot contact effectively.
- Flashlight or Inspection Light: Essential for examining both the exterior vent opening and the lint trap housing slot before and after cleaning. A clear visual of what is actually coming out of the duct during brushing helps you gauge progress and confirms when lint has stopped appearing.
- Foil Tape: If you discover during the cleaning process that the transition duct connecting the dryer to the wall duct has come slightly loose at its connection point, foil tape is the correct material to reseal it. Do not use standard duct tape, which degrades rapidly with heat exposure and loses adhesion within months.
- Work Gloves and Safety Glasses: Lint dislodged during duct brushing falls and drifts toward the person doing the work. Gloves protect your hands when handling the brush rods, and safety glasses prevent fine lint fibers from contacting your eyes during the process.
When This Method Has Reached Its Limits

The six-step no-move method is effective for the majority of standard residential dryer vent configurations, but it has clearly defined limits that every homeowner should understand before deciding whether a DIY cleaning is sufficient or whether professional service is the more appropriate choice.
Vent Configurations Where the No-Move Method Works Well
For straight or nearly straight vent runs of up to 25 feet that exit through an accessible exterior wall, this method can reach and address the full length of the duct from the exterior end. Single-story homes with laundry rooms on exterior walls and short, direct vent runs are the best candidates for this approach, and homeowners in these configurations can typically achieve results equivalent to a pull-out cleaning with the right tools and technique.
Vent Configurations Where Professional Cleaning Is the Better Choice
| Vent Configuration | No-Move Method Effective? | Recommended Action |
| Straight run under 20 feet, exterior wall exit | Yes, fully effective | DIY with brush kit and vacuum |
| Run with one 90-degree bend under 25 feet | Mostly effective | DIY, check airflow carefully after |
| Run with two or more bends | Limited reach at bends | Professional cleaning recommended |
| Vertical vent run through roof | Ineffective without professional tools | Professional cleaning required |
| Run over 25 feet | Brush kit may not reach full length | Professional cleaning recommended |
| Active burning smell or heat issues | Not appropriate | Stop use, call professional immediately |
| No airflow improvement after full DIY cleaning | Method has been exhausted | Professional inspection needed |
Recognizing When a Professional Cleaning Is Overdue
Even when the six-step no-move method is successful, it has a maintenance limit. For homes in Savannah and surrounding areas, where year-round dryer use and humidity create faster-than-average lint accumulation inside vent ducts, professional cleaning every one to two years is the standard that keeps the system genuinely clear rather than just superficially improved. If your dryer has been through multiple DIY cleaning cycles without a professional service in several years, the accumulation at bends, transitions, and deeper duct sections has almost certainly reached a level that consumer tools cannot address.
Your Dryer Vent Deserves a Clean You Can Actually Rely On
Cleaning your dryer vent without moving the dryer is a practical and worthwhile maintenance task that every homeowner can manage with the right tools and technique. Done correctly and consistently, it removes the most accessible lint from the system, maintains reasonable airflow, and extends the interval before a more intensive professional cleaning becomes necessary. But it is a maintenance habit, not a substitute for a full professional service when the accumulation level or duct configuration exceeds what the method can reliably address.
Pro Shine Professional Cleaning serves homeowners throughout Savannah and surrounding areas with professional dryer vent cleaning that reaches the full length of the duct system regardless of configuration, routing, or buildup level. Our technicians use professional-grade equipment, inspect before and after every service, and confirm that your vent is exhausting freely and safely before the job is called complete. Whether you are supplementing your own maintenance routine or dealing with a system that has been neglected longer than it should have been, contact us today and let our team handle the parts of your dryer vent that a brush kit simply cannot reach.

Clean Air Is Just A Call Away!